ips-card
How is the ID-Card generated?

Hier sehen Sie alle Schritte der Ausweis-Generierung. Es gibt Hilfen zur Bilder und -Dateneingabe.
Hier sehen Sie alle Schritte der Ausweis-Generierung. Es gibt Hilfen zur Bilder und -Dateneingabe.

After visiting the access URL we have issued, an empty identity card with an individual ID is created. With the help of this ID, the identity card is always clearly assigned to the individual card holder.
The access URL contains the partner ID and their access code. If the login data is correct, the corresponding partner logo will be displayed on the ID-Card, and the name of the institution will be copied onto the Ecard.
The validity of the ID-Card is fixed with the issue of the Ecard for one year. However, it is also possible for the institution to define the period of validity. This can also be done through the access URL.
First, click on the "Durchsuchen” button. A window will open in which you can search on your device for a suitable picture for your ID-Card.
For best results, the picture should be in portrait mode. The picture is then modified by our system. Therefore, if possible, the face should be in the middle of the photo.
The picture is first scaled to the correct size, and then the sides are cut. You can also test several different pictures. By clicking the "Ansicht generieren" button, the picture can be viewed in the ID-Card again and again.
When you are happy with the result, fill out the remaining fields.
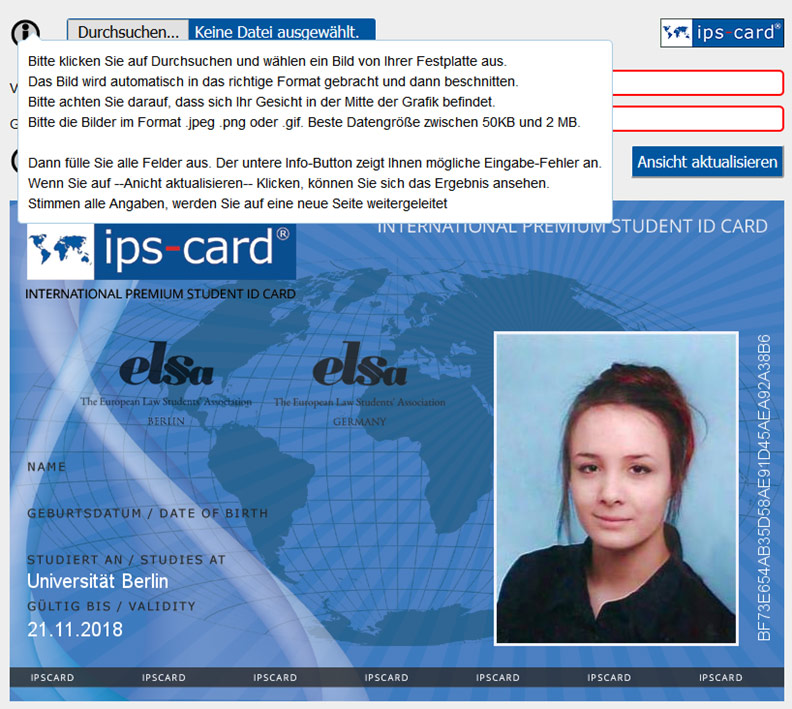
Please submit the picture in either .jpeg, .png, or .gif format. The best size is between 50 KB and 2 MB.
It occasionally happens that a picture is placed on the ID-Card in landscape format.
If this happens, you have most likely taken the picture with an older iPhone. Here, the landscape format is entered into the image file.
In these rare cases, try to take the picture in portrait mode, or use a picture from another source.
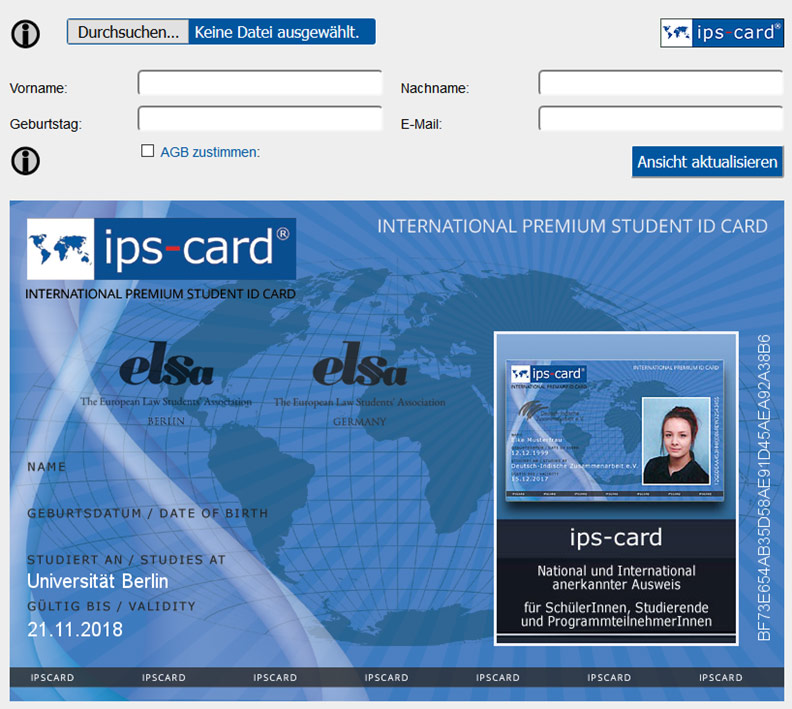
Please enter the first name, last name, date of birth, and email address (a summary of the ID-Card will later be sent to this email address).
Please fill out all fields, and click that you agree to the Terms & Conditions. Then click the button "Ansicht aktualisieren".
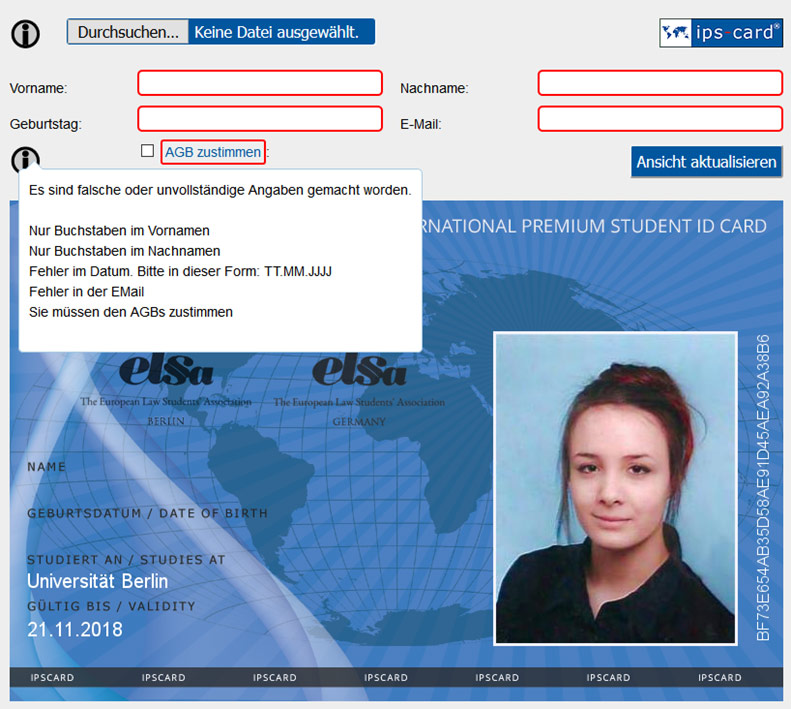
Then the entered data will be transferred to the ID-Card. By rolling over the lower Info Button you can see any possible input errors.
In addition, any fields with incorrect entries are displayed in red.
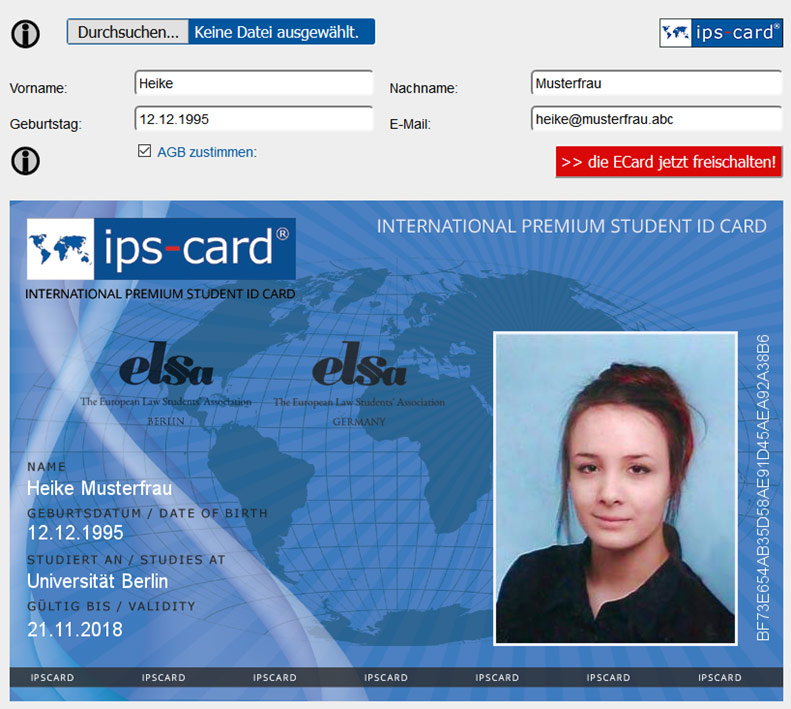
When all the data is entered correctly, the ID-Card is generated by pressing the button "die Ecard jetzt freischalten".
All the data is then written into our database (for various security reasons).
You will then be directed to a new page. Here all the information about the ID-Card is summarised once again.
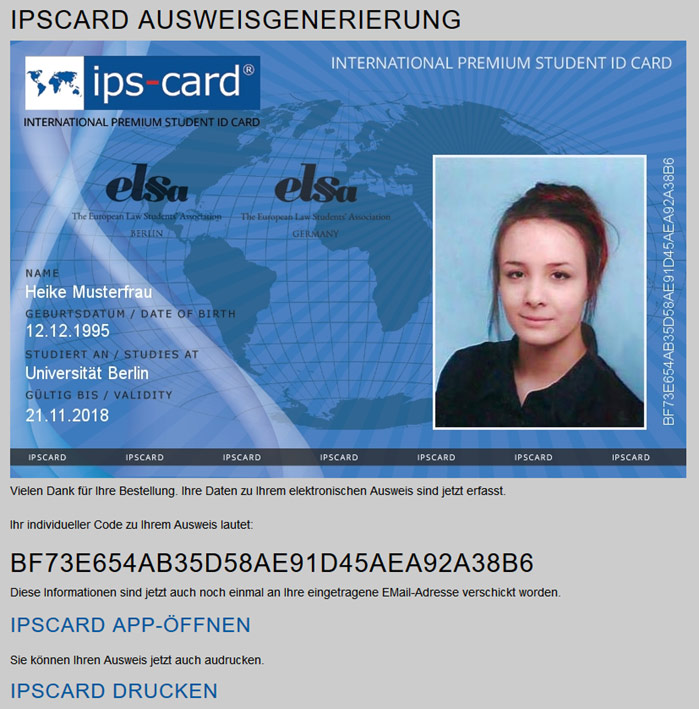
If you see this screen, a summary of all information on the ID-Card has already been sent to the entered email address.
You will also be shown all the data again:
The individual ID, with which you are clearly assigned.
A link that downloads the Store Finder app with the ID. Thus, the ID can be accessed at any time from the app, and presented to a discount partner.
A link that you can use to print out the ID, if you wish.